Everything You Ever Wanted to Know About Co-Witnessing Part Two
Last week, we laid the groundwork for discussing co-witnessing, and hit on some of the big-picture issues when it comes to talking about why you would, or wouldn’t, want to use co-witnessing on your own setup.
This week let’s take a closer look at what co-witnessing can and can’t do for you as a shooter, and dive into some of the most frequently discussed co-witnessing topics.
Co-Witness Facts
The problem that remains with “co-witnessing” red dots and irons is a classic combination of “overthinking it” and maybe a slight misnomer with the term “co-witness.”
First off, the term “Co-witnessing” to some people seems to imply that the irons must be lined up with the red dot to be aimed properly.
You’ll be very happy to know that’s not the case – the last thing we’d want to do is give you yet another thing to have to “line up” before pulling the trigger. Once zeroed at an appropriate distance and assuming we’re shooting at a distance within our firearm’s capabilities with that zero, all you need to do is put the red dot on the target where you want the bullet to go, pull the trigger without disrupting the gun’s point of aim, and that’s where the bullet goes.
A front iron sight and a rear iron sight need to be lined up properly to aim the gun correctly at the target, and this requires a very consistent head/eye placement behind the rear sight.
If you had the gun locked in place and moved your head/eye around behind the rear sight, you would see that it appears as though you are aiming at different spots on a target down range depending on where your eye is located. This is “parallax error.” Red dots, for all intents and purposes, don’t have parallax error, so even as your head/eye are put in different positions behind the optic and the red dot inside the optic appears to be in different portions of the field of view, it’s always still aimed at the same spot down range.
This trips some people up and, again, causes them to want to go back to the old iron sights where they can visually see everything “lining up” before pulling the trigger. Trust the red dot – where it is over the target is where your bullet will go, assuming you’re all sighted in! The gif we’ve created here shows this perfectly – despite the fact the red dot appears to be moving around the field of view, it’s still hovering over the same spot on the target down range.
Red dots don't suffer from parallax error. In this gif, you can see that even as the camera's position behind the gun changes, the point of aim remains the same.
Red dots are faster and more accurate than iron sights.
Certainly, this is the part where the gun slingers come out and tell us we’re wrong but hear us out. Yes, there are plenty of people who can shoot extremely quickly and accurately with iron sights. None of those people got to where they are today, though, without years and years of intense and focused practice on their skill.
There’s no two ways about it – the act of lining up three images on three focal planes (A target, a front sight and a rear sight) perfectly and then pulling the trigger will never be picked up as naturally or progressed more quickly than looking at a target, putting one red dot over it where you want a bullet to go and then pulling the trigger when the red dot is in the right spot. So, with this being said, make the full leap to your red dot and don’t look back. Your irons can be there as a backup, but …
Your red dot and your irons are two independent sighting solutions that are designed completely different from one another.
The irons, when coupled with a red dot mounted at a height that allows them to co-witness through the optic’s field of view, are to be used as backup sighting devices should the red dot’s battery die, leaving you with no other point of aim. Until some catastrophic event like that occurs, you should simply ignore the irons.
Nowadays, there are rifles with backup iron sights that flip up/down to stay completely out of the way when not in use.
In these cases, it really doesn’t matter whether you have lower 1/3 or absolute co-witness in terms of red dot height because you won’t even be seeing the irons at all unless your red dot ceases to function.
This might really upset some people, but a great deal of military, law enforcement and private citizens are foregoing iron sights altogether in this day and age.
With red dots being so incredibly reliable and lightyears more efficient in regard to battery life than ever before, there’s hardly a need to take up the rail space necessary to even mount backup irons. This may not be an option for you or may be beyond your comfort level, but in cases like these, shooters are able to fit more important devices on their firearms, or mount their optics at even higher heights to accommodate a more comfortable/quick shooting position.
Frequently Asked Questions
Let’s take a look at some of the most frequent topics and most frequently asked questions involving co-witnessing.
“I heard I can sight in my iron sights and then when I mount a red dot, just adjust the red dot to line up with those and it’s all set.”
That might get you close, but never rely on this method for an actual zero. Again, these are two completely different sighting systems that work in two completely different ways. To really confirm your zero with a red dot, shoot it without using the iron sights at all and fine tune as needed.
“I heard using the red dot through the iron sights will mitigate the problems I have with a starbursting red dot from my astigmatism.”
9 times out of 10 (OK, we didn’t actually do the math to get that number, but it’s a lot), the “starbursting” people are seeing with their red dot is not due to an astigmatism at all, but rather a brightness level of the illuminated red dot that is too high for ambient lighting conditions. Turning the brightness on the red dot down often fixes this issue entirely and avoids any need to waste time lining up irons and a red dot. If you go that route, don’t even get the red dot in the first place because you’re robbing it of all its advantages in the first place!
“Okay. I get it for rifles, but what about pistols?”
As we alluded to earlier on, pistols are the wild west when it comes to sighting systems. All the same ideas still apply for the most part, and many of the same misconceptions by some shooters. With seemingly endless varieties in the platforms themselves, a huge array of different iron sight styles and heights, and zero standard for mounting a red dot optic, it isn’t nearly as cut and dry as a “lower 1/3” and “absolute” co-witness like it is with AR-15’s and other similar carbines. To make matters easier for this explanation, we’re going to assume you’re mounting a red dot on one of the many widely available, polymer-framed, optics-ready pistols on the market.
Low-profile iron sights can often be completely blocked by a red dot.
Generally speaking, the stock “battle sights” that come on most handguns out of the case are too short to rise up over the body of the red dot. This would not be considered “Co-witnessing”.
Some of these “optics-ready” pistols are starting to come with taller sights that are just tall enough to peek over the top of the optic body. Of course, different red dot optics have different dimensions. For example, our Viper® red dot (pictured on the various pistols in these photos) is very low profile and therefore these irons are tall enough to be used through the optic in a pinch. Others, like our Venom® or Razor® red dots, may not be without resorting to even taller iron sights still.

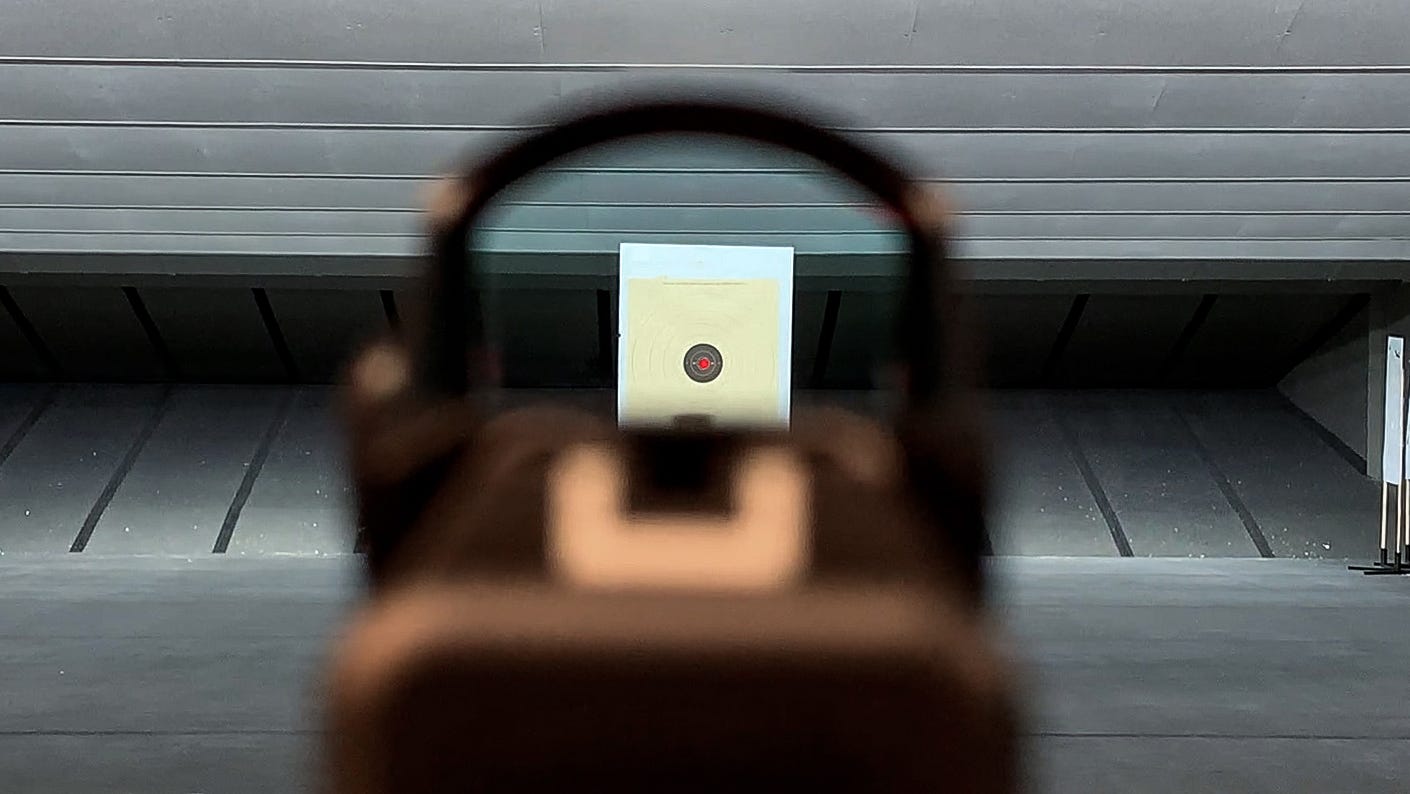
While these tall, suppressor-height iron sights do allow a co-witness of sorts, they essentially block the red dot.
In this picture, you can see a Viper® red dot mounted between some super-high suppressor height iron sights.

In this case, the iron sights are almost too high and begin to block the red dot from the target, effectively negating the advantages of having a red dot mounted in the first place.
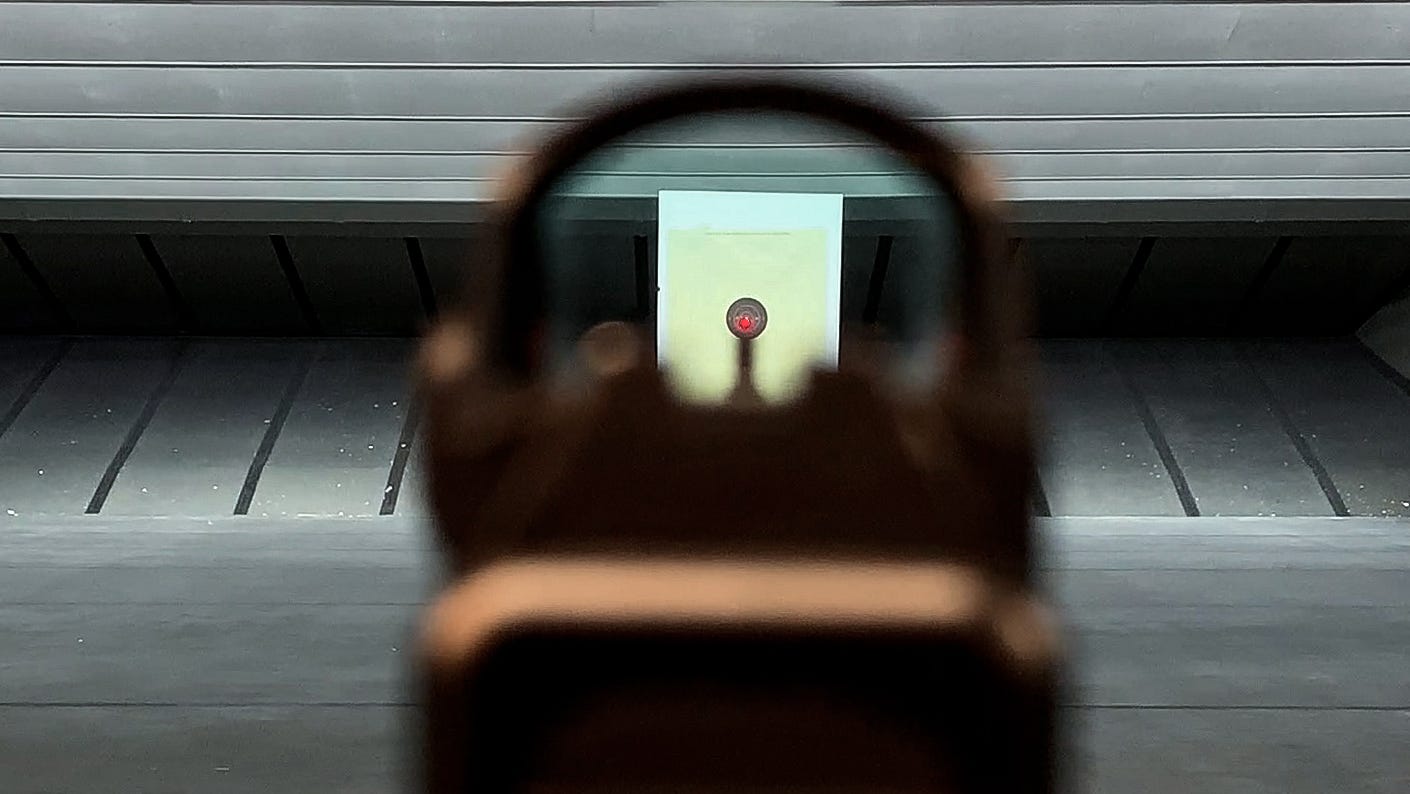
Here, you can see an effective co-witness: The red dot is clearly visible above the front iron sight, and the iron sights can still provide a point of aim if necessary.
Wrapping Up
So, in summary – Use your red dot, don’t worry about your irons or co-witnessing. If the fear of some sort of crazy failure haunts your dreams and keeps you up at night, throw some irons on your gun or get a setup that allows for a co-witness, but don’t let it interfere with the primary optic, your red dot, and its many advantages.
It’s our hope you can learn and laugh along with the expert voices we feature on this blog. We want to be clear that the opinions you see featured here are just that: opinions. The content belongs to the authors and is not necessarily the opinion of Vortex Optics.
To learn more about what you’ve read, please like, follow, and otherwise support our authors.


