How to Properly Mount a Riflescope
Mounting a riflescope may seem like a daunting and overly technical task, not to mention how integral a proper mount is to shooting accurate and ethical shots in the field. But with the right tools and a little patience, you can ensure your optic is mounted properly, right at home, providing season-after-season of performance.
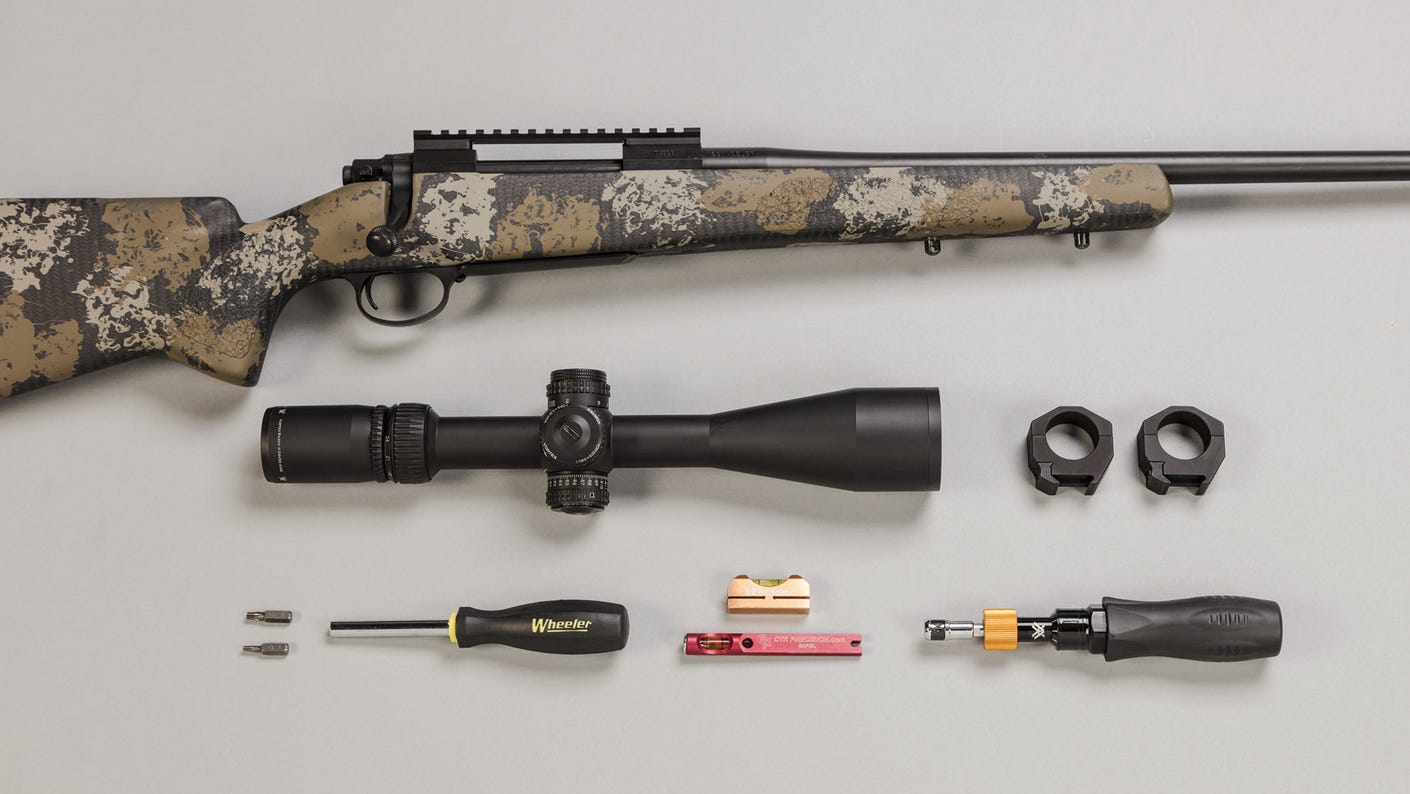
Tools of the trade
A few tools we here at Vortex® would recommend for making the process easier:
- A well-lit, sturdy bench with a gun-vise.
- Quality hand tools that match the fasteners on your rings and mounts.
- A torque wrench.
- A small bubble-level – better yet, a few small bubble-levels!
Mount up
Assuming your firearm has the appropriate bases already properly installed, and your firearm is unloaded:
Step 1. Secure the scope rings to the base at the recommended torque value. Most rings are held secure between 35-45-inch pounds.
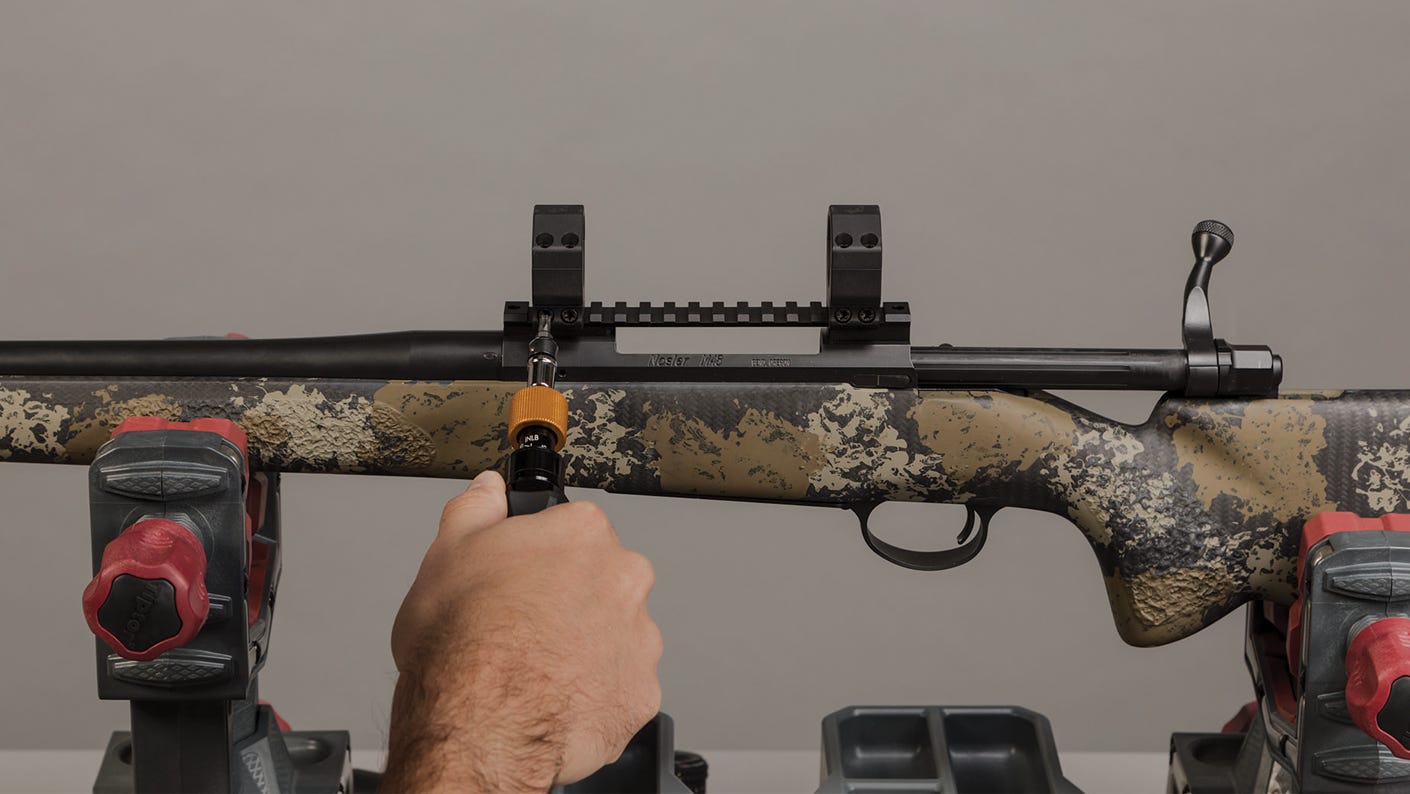
Step 2. Install the optic in the rings at the highest magnification, but don’t completely secure the ring screws quite yet. We recommend spacing the rings no closer than 3/8” from the magnification adjustment ring in the rear, and centered, or slightly forward of center on the tube in the front. DO NOT let the rings butt up against the mag ring, either side of the turret saddle, or the objective bell.
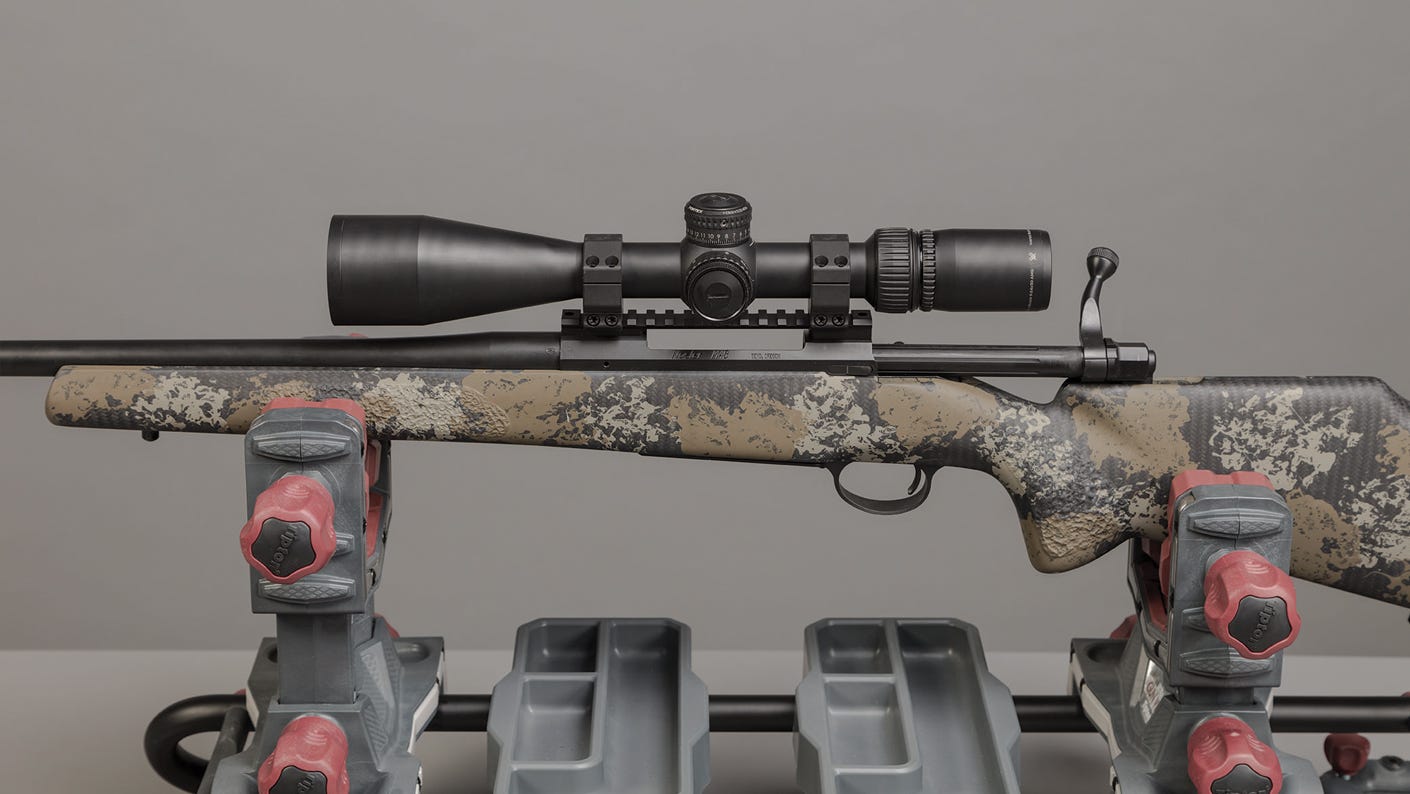
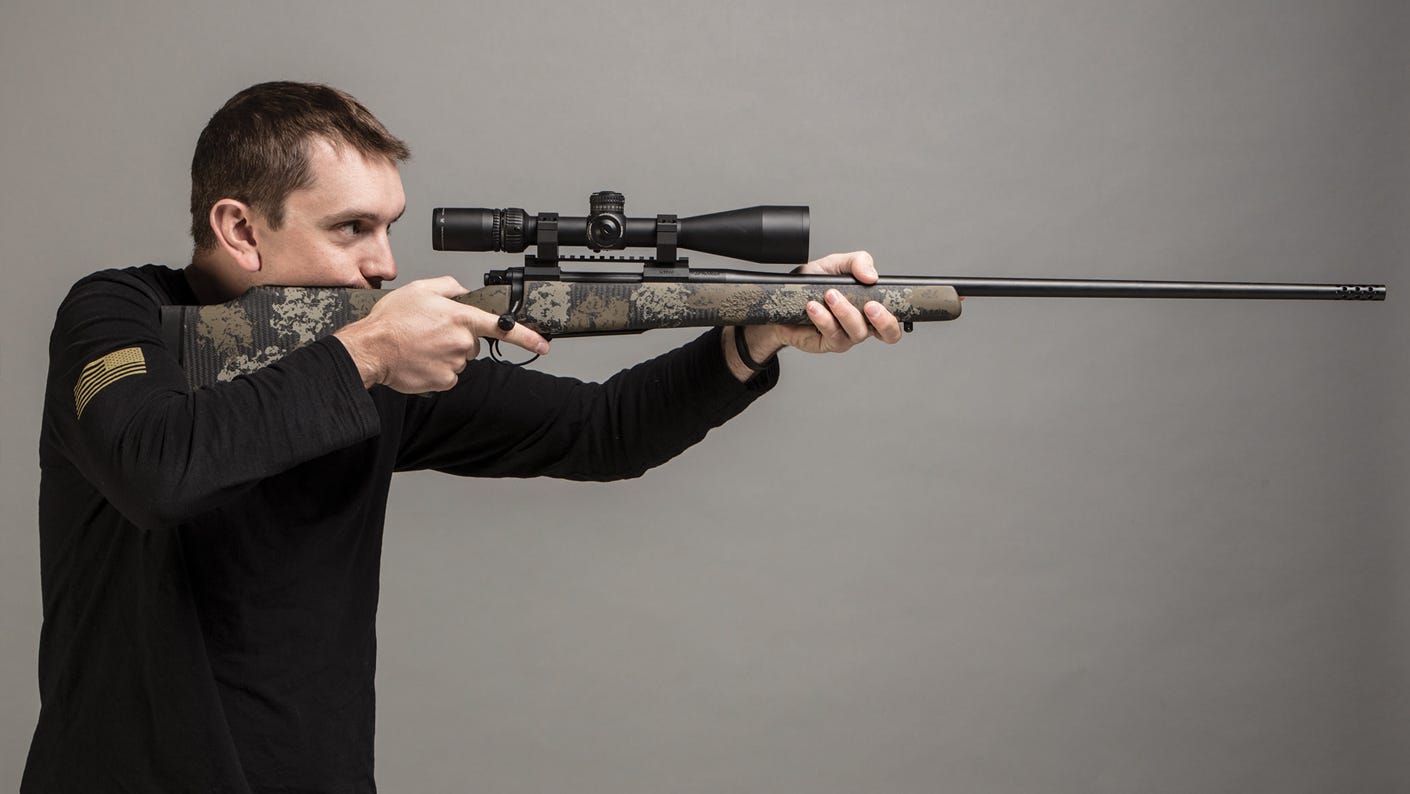
Step 3. Make sure your rifle is set to its highest magnification. With your rifle shouldered, you should have a full sight picture with your head in a natural position. Move the riflescope fore-and-aft in the mounts until that is achieved.
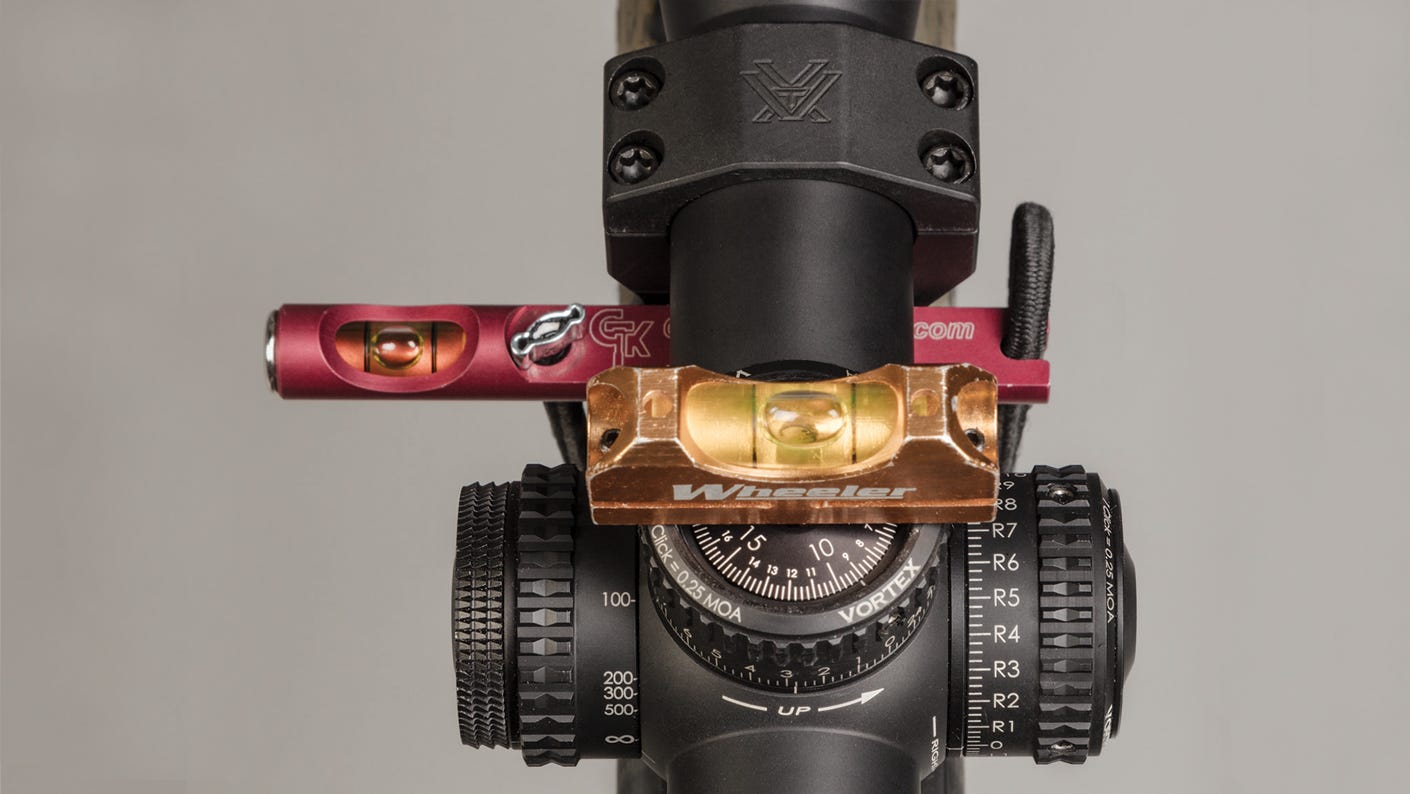
Step 4. Place your rifle into your vise or secure work surface, and finding a flat-spot on the scope, such as the base, place a level atop it and level-out.
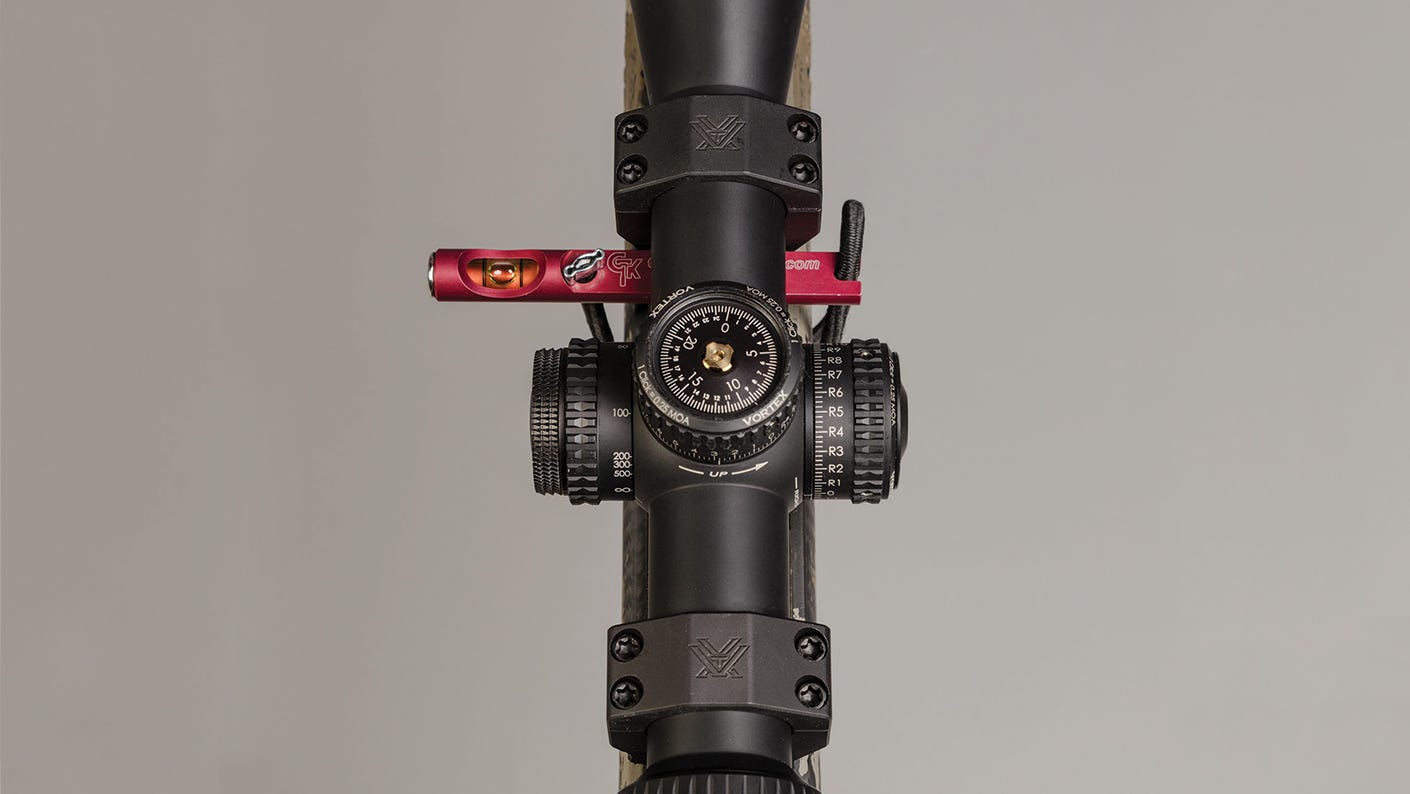
Step 5. Consider removing your turret cap. This will allow you to level as close to the turret adjustment screw as possible, providing the highest potential for accuracy in leveling. Place the level atop the turret and level-out.
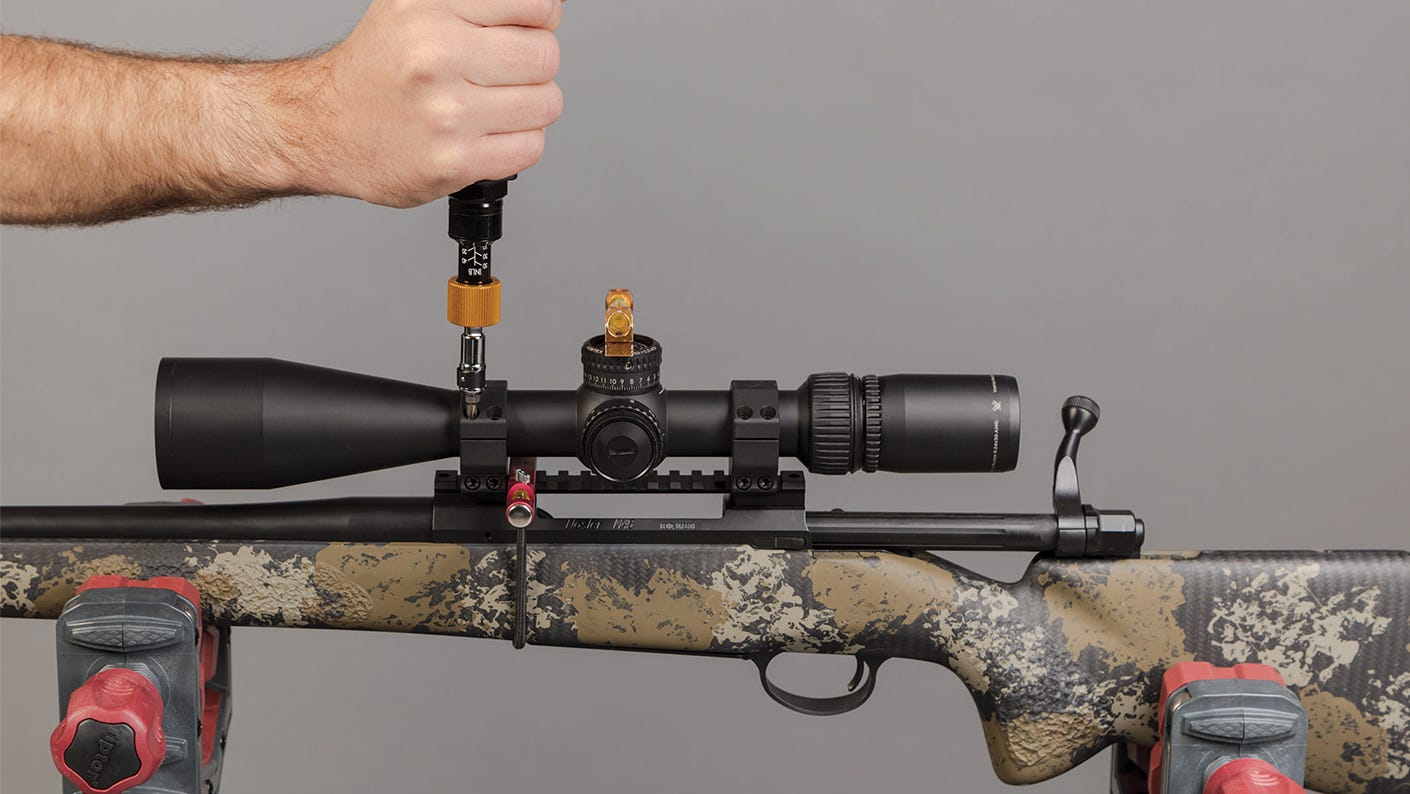
Step 6. Incrementally tighten your scope ring screws to our recommend torque-poundage – about 15-18in.lbs, without the use of any thread-locker. If you’re mounting horizontally split rings, be mindful of the gaps on either side of the rings, trying to keep them evenly spaced. If your rings are vertically-split, it’s possible you might need to fully tighten one side of the ring before moving on to the other. (If you’re unsure, give us a call.)
There’s a ton of different optics, rings, and mounting systems out there, and there’s no step-by-step guide that can cover all of them. If you have a unique mounting system, or if you have questions at any point in the process, just give us a call and we’ll get you dialed.
Still have questions?
If you want to go deeper into proper riflescope mounting, here are some resources to help you get locked in:
- If you want to learn more about properly mounting your optic, checkout this video.
- If you want to learn more about what rings and mounts are right for you, checkout this blog.
- If you want to learn more about properly torqueing your rings, checkout this 10-minute talk.
- If you want to learn more about bore sighting your rifle, checkout this 10-minute talk.
If you have any other questions, please give us a call at 1-800-4VORTEX to talk to one of our experts.
It’s our hope you can learn and laugh along with the expert voices we feature on this blog. We want to be clear that the opinions you see featured here are just that: opinions. The content belongs to the authors and is not necessarily the opinion of Vortex Optics.
To learn more about what you’ve read, please like, follow, and otherwise support our authors.


